Monthly Archives: February 2014

Treat Box and Fancy Fold Card

Hi blog friends and welcome to this Wednesday’s Heartfelt Creations’ Inspiration!  So glad you could pop by.

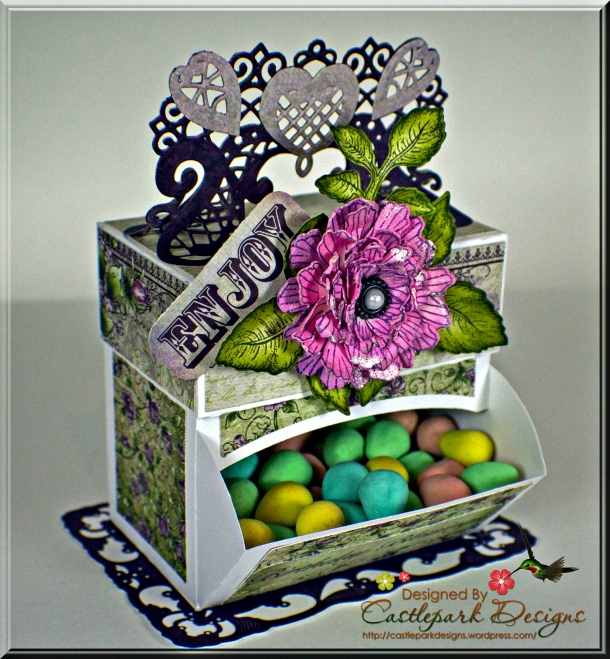
I want to share with you today a cute little treat box and yet another fun Fancy Fold!

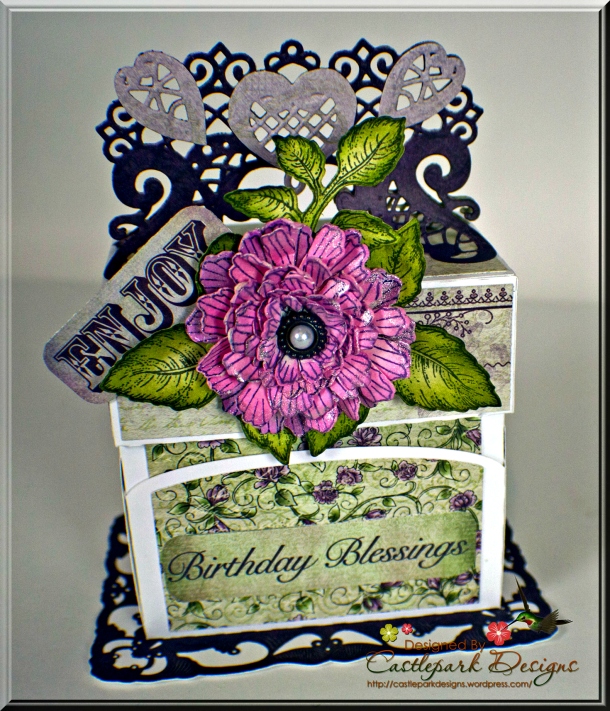
First let me show you the treat box.  I just love the handle on the box using the lovely new Raindrops on Roses die.

Joann-Larkin-Birthday-Blessings-Closed

Joann-Larkin-Birthday-Blessings-Open

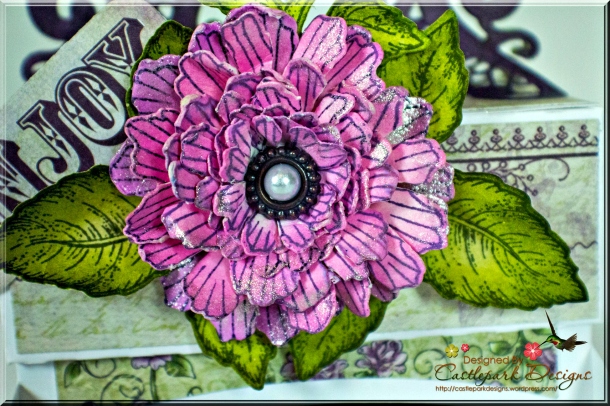
and of course the flower:

Joann-Larkin-Birthday-Blessings-Flower

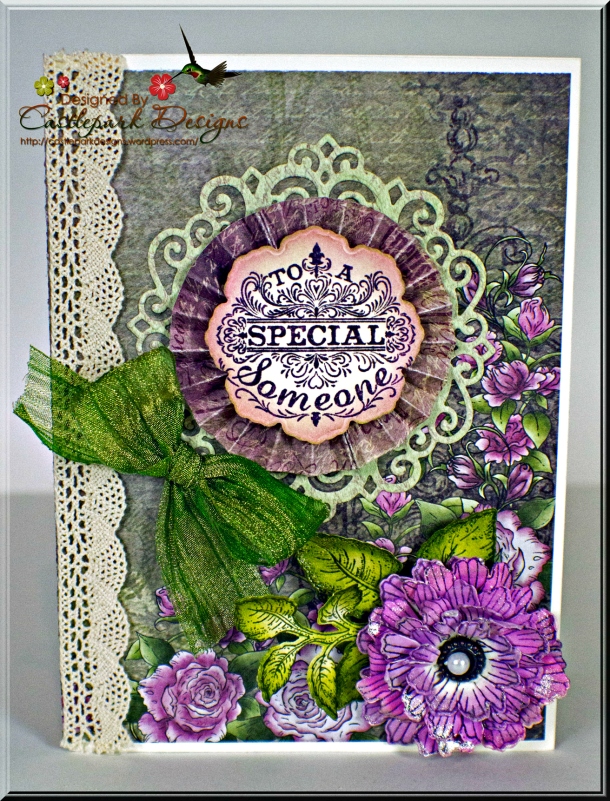
and now here is a look at the Fold:

Joann-Larkin-To-A-Someone-Special

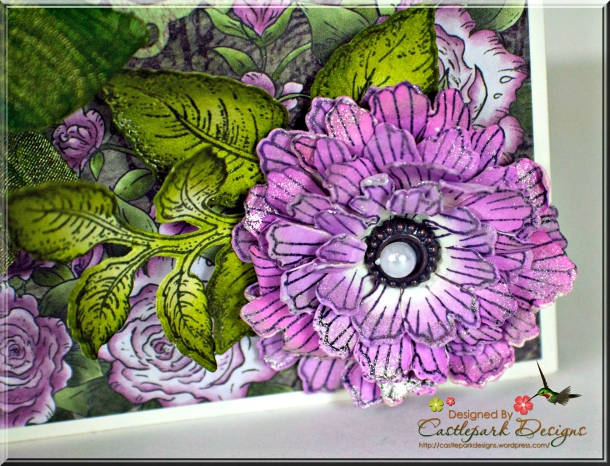
Joann-Larkin-To-A-Someone-Special-Flower

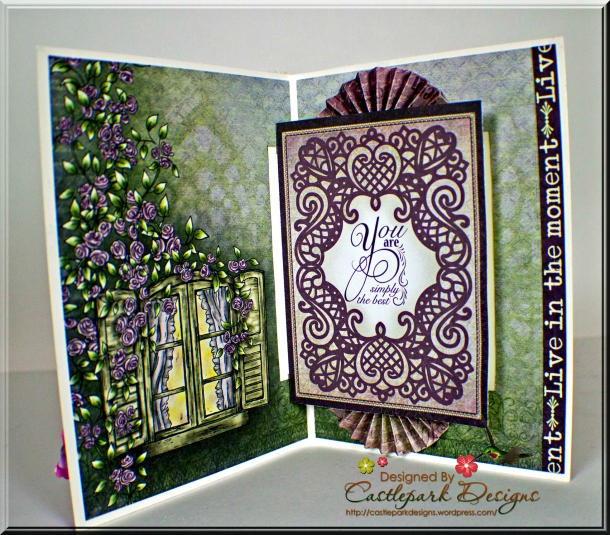
I particularly love the inside of the card, showing of the lovely Heartfelt Creations Raindrops on Roses Collection!  The collection papers just get better and better!

Joann-Larkin-To-A-Someone-Special-Inside

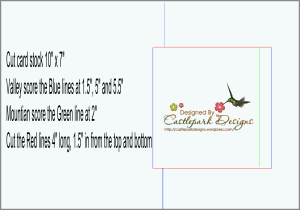
Here is the template for the Fancy Fold:

template

Treat Box

Products Used:

HCPC 3545 – Open Leaf PreCut Set
HCPC 3578 – Majestic Morning Background PreCut Set
HCD 736 – Classic Leaf Die
HCD 742 – Majestic Blooms Die
HCD 743 – Raindrops on Roses Die
HCDP1 240 – Raindrops on Roses Paper Collection
Nobel Rectangles

Project Instructions:

Other products: White Card Stock, Memento Ink – Elderberry and Olive Grove, Bling from my stash, Distressed Ink, adhesive and die cutting machine.

Instructions:

Start by building a box 4″ wide x 2 1/2″ deep x 3 1/2″ tall and made a matching top.  For the flap the opens I used a template from another box that I had but for you to make it simply take a strip of card stock 9″ x 2″, measure to find the center of the long edge and measure 2″ out from the center on both sides.  This will be the outside of the flap.  Next, cut starting from the edge of the marks for the edge of the flap to the bottom outside corners of the paper to allow the flap to open and close.  Scor at the edges of the flap marks and insert into the opening.  I made a 4″ x 4″ strip of paper scored in the middle and used this to attach the flap to the bottom of the box.  Decorate the box using your favorite dies cuts, flowers and sentiments and finish the top of the box off with 2 die cuts from the Raindrops and Roses Die to form a handle.  Finally, fill with your favorite sweet and enjoy!

Fancy Fold

Products Used:

HCPC 3545 – Open Leaf PreCut Set
HCPC 3578 – Majestic Morning Background PreCut Set
HCPC 3584 – Lady Rosealie PreCut Set
HCD 736 – Classic Leaf Die
HCD 742 – Majestic Blooms Die
HCD 743 – Raindrops on Roses Die
HCDP1 240 – Raindrops on Roses Paper Collection

Project Instructions:

Other products: Off White Card Stock, Delicate Doilies, Memento Ink – Elderberry and Olive Grove, Embossing Powder, Lace and Bling from my stash, Distressed Ink, adhesive and die cutting machine.

Instructions:

Start by making a basic 5″ x 7″ card and using the template provided make the inside out of the same card stock.  Attach the 2 pieces together and decorate with your favorite DP.  For the front of the card I made a rosette from a 1 1/2″ strip of DP and centered that between my sentiment and a die cut from the raindrops on roses die set.  Of course, no card is complete without a flower which I made using the Majestic Morning Background PreCut Set and coordinating die.

I hope you enjoyed this post as much as I did making it for you.  Hope to see  you again soon.  I love to read your comments, thank you so much!
joann sig 2

Topsy Turvy Cake Anyone?

Hello blog friends I hope you are enjoying a great Sunday and enjoyed watching the 2014 Winter Olympics!

Over at the JustRite Inspiration blog, Sheri has given us a lovely challenge this time around for the JustRite Friday Challenge – Spring Cheer.  The theme for this challenge is to create a project using a cheerful Spring color palette.  I have a dear friend who will be celebrating a birthday very soon and while looking through my JustRite stamps I came across my Topsy Turvy Cakes stamp set and remembered seeing a Topsy Turvy cake cut file so I decided to do both! I hope she will like it!  This was a fun project to do especially since the stamp matched the cake so perfectly : )   This was the first time I have used the Jewel Flowers and Flourishes die and thought the flowers were fun to make and were a great addition to this project.

 Joann-Larkin-Topsy-Turvy-Cake-and-Card

and the cool part about the cake box is it opens up into 2 separate boxes so you can include a few goodies!  I had a few special goodies set aside for just a project like this but it appears someone in my household (not mentioning any names…) found them LOL!

Joann-Larkin-Topsy-Turvy-Cake-Open

and here is a closer look at the Interlocking card

Joann-Larkin-Topsy-Turvy-Card
Joann-Larkin-Topsy-Turvy-Card-Open

The other products I used were:

JustRite Topsy Turvy Cakes stamp set
JustRite Celebration Labels One & Bracket Borders One
Spellbinders A2 Bracket Borders One
Spellbinders Labels Ten
Spellbinders Jewel Flowers and Flourishes
Spellbinders Classic Ovals Small
Spellbinders Classic Ovals Large
Spellbinders Floral Ovals
Spellbinders Gold Ovals One
Spellbinders Grand Labels One

I am entering this project in the following challenges:

JustRite Friday Challenge #115 – Spring Cheer
“More Than One Score” Scor-Pal Challenge #1 – Flowers
Hexagons: Happy for Hexagons Challenge in the Moxie Fab World

Thank you so much for your visit today.  I love to read your comments, they make my day : )

joann sig 2

Fun with Frames

Hi everyone,

I want to show you 2 fun cards that I have created using the new Raindrops on Roses collection.   For both of my cards I made a quick and easy frame and gave it a curve for dimension.

Lady Rosealie Center Side Step Card

Joann-Larkin-Sweet-Memories-With-You

and of course the flowers!

Joann-Larkin-Sweet-Memories-With-You-2

Joann-Larkin-Sweet-Memories-With-You-1

Products Used:

HCPC 3545 – Open Leaf PreCut Set
HCPC 3578 – Majestic Morning Background PreCut Set
HCPC 3584 – Lady Rosealie PreCut Set
HCD 736 – Classic Leaf Die
HCD 742 – Majestic Blooms Die
HCDP1 240 – Raindrops on Roses Paper Collection
Grand Decorative Ovals One

Project Instructions:

Other products:  White Card Stock,  Pearls from my stash, Distressed Ink, adhesive and die cutting machine.

Instructions:

Start by making a Center Step card and then stamp, color and die cut the Lady Rosealie PreCut Set for the center of the card.  To make the frame, use the die that was used to cut out the stamped image along with the next size up die and attach to the stamped image bending the sides in slightly so the frame curves.  Once that is complete, stamp, distress and die cut several of the  Majestic Blooms flowers and a few leafs to finish off the card and attach where you would like them placed.

To A Special Someone

Joann-Larkin-To-a-Someone-Special

Joann-Larkin-To-a-Someone-Special-1

and the flowers!

Joann-Larkin-To-a-Someone-Special-Closeup

Products Used:

HCPC 3545 – Open Leaf PreCut Set
HCPC 3578 – Majestic Morning Background PreCut Set
HCD 736 – Classic Leaf Die
HCD 742 – Majestic Blooms Die
HCDP1 240 – Raindrops on Roses Paper Collection
Decorative Labels Twenty Eight

Project Instructions:

Other products:  5 x 7 Enchanted Labels Twenty Eight, White Card Stock, Sparkle, Ribbon and Pearls from my stash, Distressed Ink, adhesive and die cutting machine.

Instructions:

Create a 5″ x 7″ card out of card stock and attach the largest die from the 5 x 7 Enchanted Labels Twenty Eight to the center of the card.  Die cut the Purple DP using the Decorative Labels Twenty Eight and create a frame using the same die and the next larger die and glue to the Purple die cut bending the sides in slightly so the frame curves.  Finish with a pre-made sentiment from the collection and of course a few flowers made using the Majestic Blooms stamp and die!

Thank you very much for visiting my blog.  I love to read your comments, thank you so much!
joann sig 2